How to Test Outlet with Multimeter (or Clamp Meter) in 10 Simple Steps
In today's post, we are going to explain the step by step procedure of how to test an outlet with a multimeter or a clamp meter. In our illustrations, we have used a clamp meter, however, the exact same procedure is applicable for multimeters.
We are going to explain the procedure in a way as if you are using the multimeter (or clamp meter) for the first time in your life. So, without further due, let's begin.
Step-01
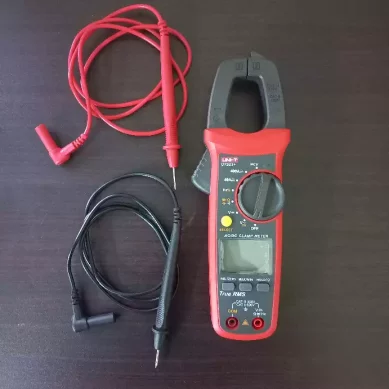
Take out your meter and the probes. The red probe is the live (or +ve) probe. The black probe is the neutral (or -ve) probe.
Step-02
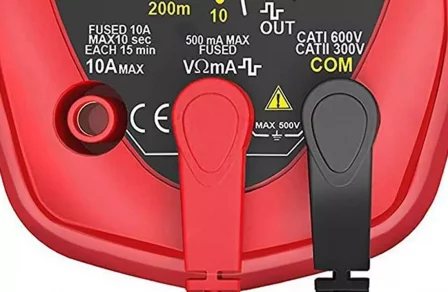
Insert the black probe into the black port of your meter (labeled as COM) and insert the red probe into the red port of your meter (labeled as V to represent voltage).
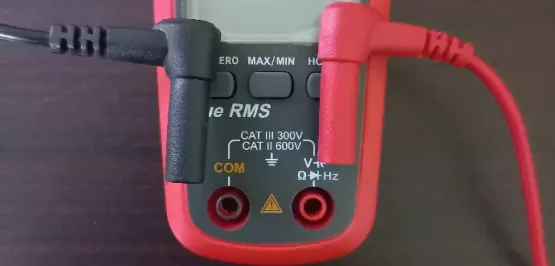
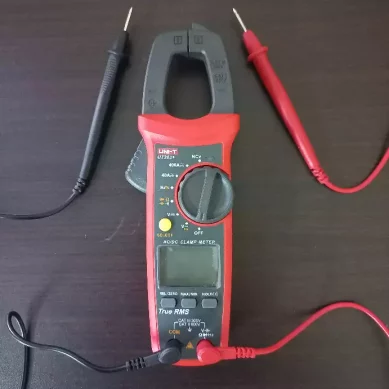
Once the red and black probes have been inserted into the meter, you are all set up.
In a multimeter, you will have more than 2 ports. You have to insert the black probe in the same COM port (as in clamp meter) and red probe in the port having V symbol (as in clamp meter).
Step-03
The selector switch of the meter is kept at "OFF" when the meter is not used.

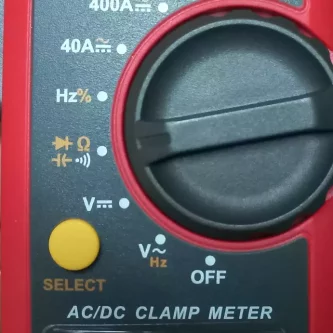
The first thing you have to do is to turn the switch to the dot having the wi-fi symbol.
Basically, this dot is for what is known as Continuity Test or Short Test. The wi-fi symbol is actually not a wi-fi symbol, it is symbol of beep sound.
Although the multimeter dial may look very different in the first look, similar symbol of continuity/short test is available and will be selected in the multimeter.

Step-04
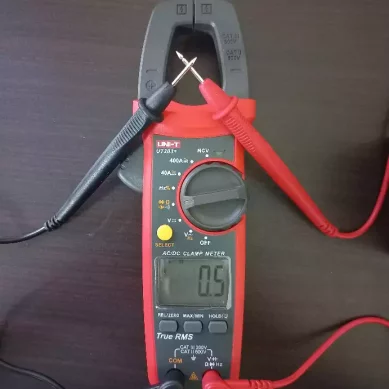
After selecting the beep mode (or Short Test), touch both probes of the meter together. The meter must produce a beep sound. It shows that our meter is working fine and that we can test our outlet with it next.
Ignore the numerical reading on the display as long as you have the beep sound. If it doesn't beep when both probes are touched together, there is some problem with the meter. Get it checked.
Step-05
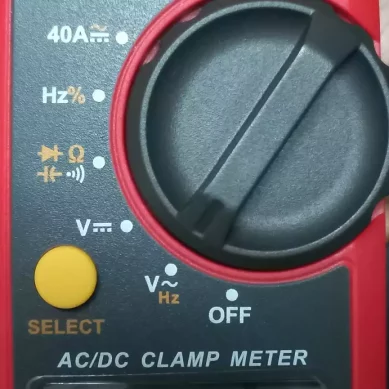
Now that we've checked out meter is okay, turn the selector switch to the dot having the "V" and "Hz" sign with a wave symbol.
V denoted Voltage whereas the Hz and wave symbol denote AC voltage (as opposed to DC voltage).
AC and DC are two types of electrical currents/power. The electrical outlet at our homes has AC power in it. That is why we have selected this particular setting.

In multimeters, the voltage selection has two options i.e., 200 and 500. If you are in United States where the standard outlet voltage is 110 Volt, you will turn the selector dial to 200 because 110 Volt are within 0-200 Volt range.
If you are in Europe where the standard outlet voltage is 220 Volt, you will select 500 because 220 Volt fall in the 200-500 Volt range.
Step-06
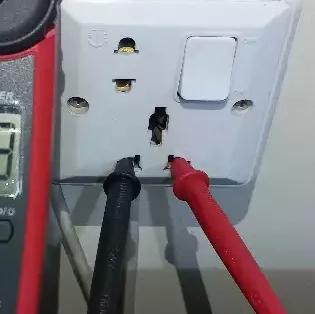
Insert the red and black probes into your electrical socket’s two parallel ports. These two ports are live and neutral. The third port above the center of these two ports is ground port in our outlet.
The convention used in Britain and Europe is to have the earth/ground port above the live/neutral ports. In United States, ground port is located below the live/neutral.
It doesn't matter which color probe you insert in which side of the live/neutral port.
Step-07
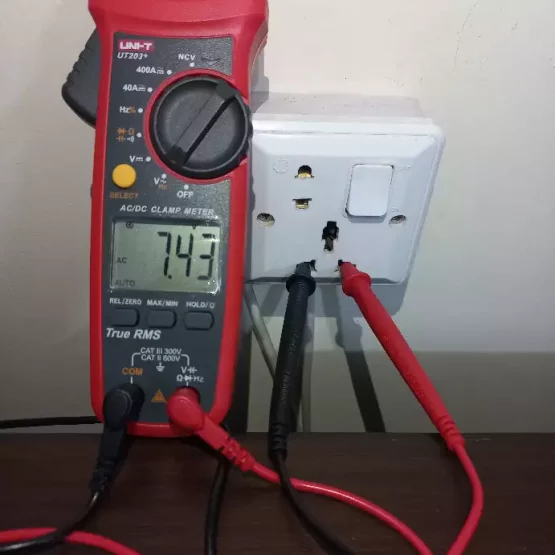
Check the reading displayed on your meter with your outlet turned off. Ideally, it should be zero.
In our demonstration, it measures 7.43 Volt. Does that mean the outlet is faulty? No. The small voltage that you get in residential sockets even when they are off is called "Phantom Voltage" or "Ghost Voltage".
It is a scientific phenomenon that causes a small voltage to be induced even when the outlet is turned off. It is generally ignorable if the value remains small, like in our case it is less than 10 Volts therefore ignorable.
If you want to read more about Phantom or Ghost Voltage, check here.
In this step, we've confirmed that our outlet is functioning normally in off condition i.e., it is not leaking current.
Step-08
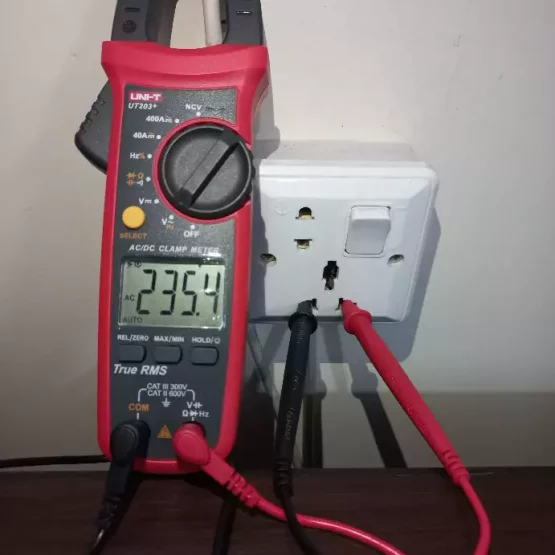
Turn the switch on. Your multimeter must show the standard voltage of your country. European countries have 220 Volt as the standard voltage while United States has 110 Volt.
In our case (Europe), you can see our meter is reading 235.4 Volts after the switch has been turned on.
It is greater than the standard 220 Volt. Does that mean something is wrong? No. A little variation (up to 5%) is acceptable.
For people in United States, the standard voltage of outlets is 110 Volt, however, if the multimeter shows 5-6 volt above or below it, that is not to be worried about.
In this step, we've confirmed that in on position, our outlet is working fine and providing the needed voltage.
Step-09
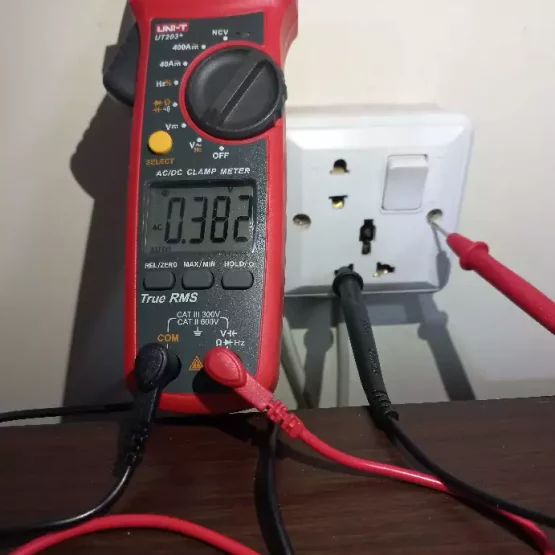
Now take out the red probe from the outlet port and touch it with the screw that fixes the outlet with the wall.
Ideally, the meter should read zero volt. Our meter is reading 0.382 Volt. Does that mean there is any problem? No.
A little variation is not to be worried about. Some of it has to do with accuracy of the meter and some with stray voltage.
In this step, we confirmed that our outlet is not internally short circuiting with the metallic screws that are fixing the outlet to the wall.
Step-10
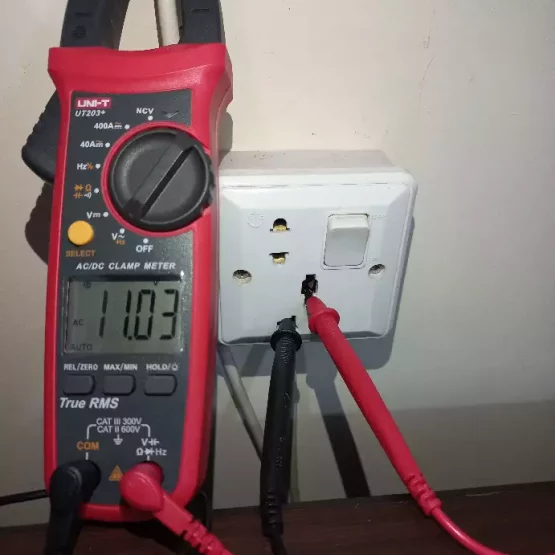
Now insert the red probe in the earth (or ground) port of the outlet.
Ideally, the meter should read zero volt. However, a variation of 3-5 volt can be ignored.
Our meter is reading 11.03 Volt. It probably means that we need to get our wiring checked. Maybe our neutral is overloaded.
In this step, we confirmed if the neutral and ground wiring is okay (which failed in our demonstration).
This completes our outlet test.
If you like this article, please share it with likeminded people.
Other suggested articles

